|
Manual Exchange 2007/2010/2013 Configuration |

  
|
|
|
Manual Exchange 2007/2010/2013 Configuration |
|
|
This is the description of setting up the Add2Exchange service account manually. Use these instructions if you cannot use the automated method using the preinstaller tool, described in the last section.
If you successfully used the preinstaller to create the service account, skip this section.
We will be creating a service account with special Exchange rights.
Create an Account
| 1. | Log onto the Exchange server as an administrator who can create accounts on your domain. |
| 2. | Open Exchange Management Console. |
| 3. | Select the Recipient Configuration list item in the left-hand pane. |
Recipient Configuration in Exchange Management Console

| 4. | Click New Mailbox... |
New Mailbox Dialog

| 5. | Make sure User Mailbox is selected. |
| 6. | Click Next >. |
User Type Dialog

| 7. | Make sure New User is selected. |
| 8. | Click Next >. |
User Information Dialog

| 9. | If you need to select an Organizational Unit other than the default, do so now (you may click Browse... to select the Organization Unit from a list). |
User Information Dialog

| 10. | Enter the information as shown (you may choose your own name for the account, but we recommend "zAdd2Exchange". If you use our name, you can cut and paste examples and commands from this manual. It is understandable to want to use a different name for security purposes, however). |
| 11. | Click Next >. |
Mailbox Settings Dialog
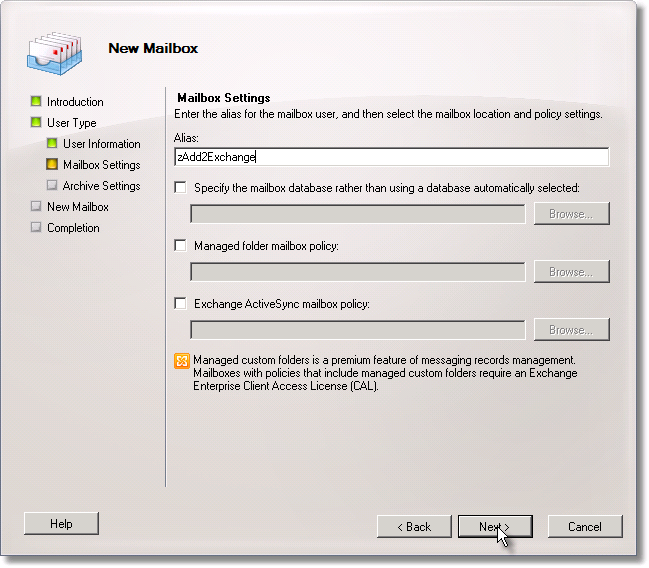
| 12. | Make sure the alias matches the login name (in Exchange 2007, you must select the Mailbox database, so click Browse... and do so). |
| 13. | Click Next >. |
Archive Settings Dialog
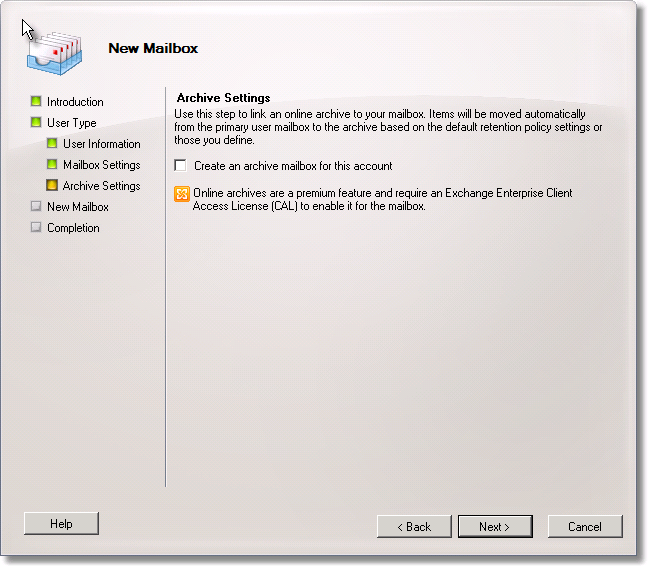
| 14. | In Exchange 2010/2013, you are asked about archive settings. Leave the archive setting blank and click Next >. |
| 15. | Click New. |
| 16. | Click Finish. |
| 17. | Open Active Directory Users and Computers (if necessary, log onto a domain controller in order to get access to Active Directory Users and Computers). |
| 18. | Find the zAdd2Exchange user. |
| 19. | Double-click on it. |
| 20. | Select the Member Of tab. |
zAdd2Exchange Properties
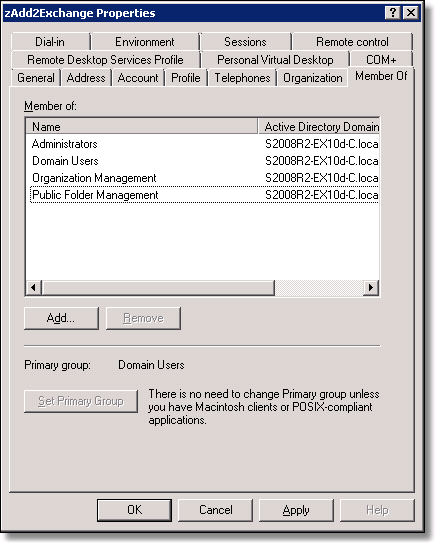
| 21. | Add the following groups: |
| • | Domain Users |
| • | Administrators (not Domain Administrators, which would prevent Add2Exchange from working) |
| • | Exchange 2010/2013: Organization Management |
| • | Public Folder Management |
- or -
| • | In Exchange 2007: Exchange Organization Administrators |
| 22. | Add the zAdd2Exchange account to the local Administrators group on this server as well as all Exchange servers. |
Set Public Folder Ownership
In Exchange 2010/2013, this command is not enabled by default. You should enable it and the other administrative scripts packaged with Exchange by adding their path to the system path. You can do this by going to the computer properties panel and going to Environment Variables in the Advanced System Settings panel. Add the following to your path:
C:\Program Files\Microsoft\Exchange Server\V14\Scripts
where C: is the installation drive for Exchange on your system. Once the path is modified, log off and back on for it to take effect.
Open Exchange Management Shell and execute:
AddUsersToPfRecursive –TopPublicFolder “\” –User “zAdd2Exchange” –Permissions “Owner”
Note: the script emits an error for the root folder. This is normal. The rest of the folders will still receive the necessary permissions.
Initialize the Mailbox
Add2Exchange's mailbox must be initialized by Exchange before syncing. You can do this through OWA or Outlook by simply logging into the mailbox once:
Outlook Web Access
Launch Internet Explorer and go to http://localhost/exchange/zAdd2Exchange. Once you've logged in, the mailbox is initialized and you're done.
Outlook
Log on to a workstation as the Service Account and create an Outlook profile through the Mail Control Panel applet.
Assign Exchange Rights
Run the following commands:
Get-MailboxDatabase | Remove-ADPermission -User 'zAdd2Exchange' -AccessRights ExtendedRight -ExtendedRights Send-As, Receive-As, ms-Exch-Store-Admin -confirm:$false
Get-Mailbox -Resultsize Unlimited | Remove-MailboxPermission -User 'zAdd2Exchange' -Deny -InheritanceType 'All' -AccessRights 'FullAccess' -confirm:$false
Get-Mailbox -Resultsize Unlimited | Add-MailboxPermission -User 'zAdd2Exchange' -AccessRights 'FullAccess' -InheritanceType all -confirm:$false
Get-MailboxDatabase | Add-ADPermission -User 'zAdd2Exchange' -AccessRights ExtendedRight -ExtendedRights Send-As, Receive-As, ms-Exch-Store-Admin -confirm:$false
In this next section, follow the right set of instructions for your version of Exchange:
|
Exchange 2013 Throttling Policy Open Exchange Management Shell. Run the following commands: New-ThrottlingPolicy A2EPolicy -RCAMaxConcurrency Unlimited -EWSMaxConcurrency Unlimited Set-Mailbox "zAdd2Exchange" -ThrottlingPolicy A2EPolicy |
|
Exchange 2010 SP1 Throttling Policy These instructions are for Exchange 2010 with Service Pack 1 and after. Open Exchange Management Shell. Run the following commands: New-ThrottlingPolicy A2EPolicy -RCAMaxConcurrency $null -RCAPercentTimeInAD $null -RCAPercentTimeInCAS $null -RCAPercentTimeInMailboxRPC $null -EWSMaxConcurrency $null -EWSPercentTimeInAD $null -EWSPercentTimeInCAS $null -EWSPercentTimeInMailboxRPC $null -EWSMaxSubscriptions $null -EWSFastSearchTimeoutInSeconds $null -EWSFindCountLimit $null
Set-Mailbox “zAdd2Exchange” -ThrottlingPolicy A2EPolicy |
|
Exchange 2010 pre-SP1 Throttling Policy and Address Book Service These instructions are for Exchange 2010 before Service Pack 1. Set Throttling Policy 1. Open Exchange Management Shell. 2. Run the following commands: New-ThrottlingPolicy A2EPolicy Set-Mailbox "zAdd2Exchange" -ThrottlingPolicy A2EPolicy Modify Address Book Service
|
|
MSExchangeIS Error Log 9646 If you get this error message in your system log, you may be running up against maximum MAPI session object limits. Open regedit and go to the key HKEY_LOCAL_MACHINE\SYSTEM\CurrentControlSet\Services\MSExchangeIS\ParametersSystem. Right-click and create a new DWORD value called MaxObjsPerMapiSession. Set the new value to 500. |
|
Exchange 2013 Logon Error If when opening the Add2Exchange Console you get a fail to log in, there are several causes:
In some environments a new DNS entry must be made for internal autodiscover to resolve this. Autodiscover may be set up external and Errors such as these in the Add2Exchange Event log will manifest:
Domain/autodiscover/autodiscover.xml: ERROR_WINHTTP_NAME_NOT_RESOLVED (MAPI_E_CALL_FAILED)
To resolve this failure to log in for 2013, you must add a new Host A record entry in DNS in the forward lookup zone which points your external www-mail hostname to the internal IP address of the server or load balancer.
|
Page url: http://guides.diditbetter.com/a2e-guide/manual_exchange_2007_and_2010_configuration.htm
