|
Relationship Alerts |

  
|
|
|
Relationship Alerts |
|
|
In certain circumstances if you go into the Add2Outlook Console, you may find some relationships moved into the section called “Relationship Alert Status”.
We have added and are continuing to add technology to check to make sure all the permissions are correct before the relationship fires, and if not, and the source or destination folders are not available, Add2Outlook will move the relationship into the “Alert” section. If the relationship is no longer valid, and the account or folder has been deleted, the relationship will be moved to the alert status section. You will need to go into the relationship and find out what the problem is, give the account permissions or re-point the source or destination folders to the appropriate place to get the relationship back working.
Tip: You should not delete and recreate a relationship in Alert status before getting the relationship back in normal status. If you delete the relationship on alert, the automatic housekeeping program that deletes the copies and unties the originals will not operate correctly.
The ideal solution is to fix the problem, such as connecting to the Exchange Server or re-enabling the account, un-hiding it from the Global Address list and then close the Console and Resync. After the sync, if you go back into the A2O Console and the relationship is in regular status, you have fixed the problem and you can proceed to replicate normally.
Some common reasons a relationship would be put in “Alert” are:
| • | Your Exchange Server is offline or your Outlook™ client is not connected. |
| • | Changing permissions for the sync account user. |
| • | Disabling a user from Active Directory. |
| • | Deleting the account and mailbox. |
| • | A relationship was built on a folder structure and then the structure was deleted and restored or client access permissions we changed. |
| • | Migrating the mailboxes or public folders to a newer version of (version, not update) Exchange Server. |
| • | Migrating mailboxes or public folders to a different store. |
Relationships Recovery Mode
If a relationship is in alert, follow these steps to reconnect the relationships by using the recovery mode.
Source in Alert
Note: If it is the Destination in Alert, follow the first 4 steps below then skip to the section Destination in Alert.
If both the Source and Destination are in alert, follow the instructions below and reconnect the relationships accordingly.
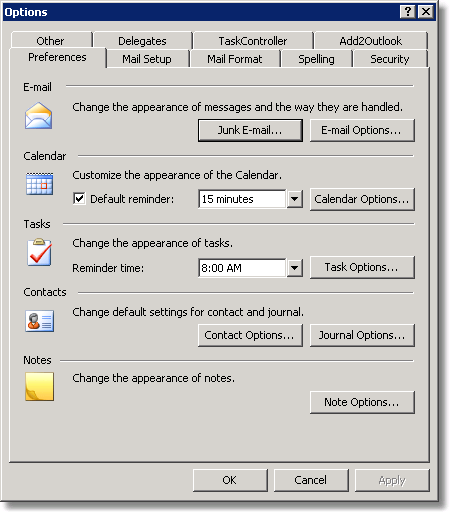
1. Click the Tools tab at the top of the page and select Options which will bring you to the screen above.
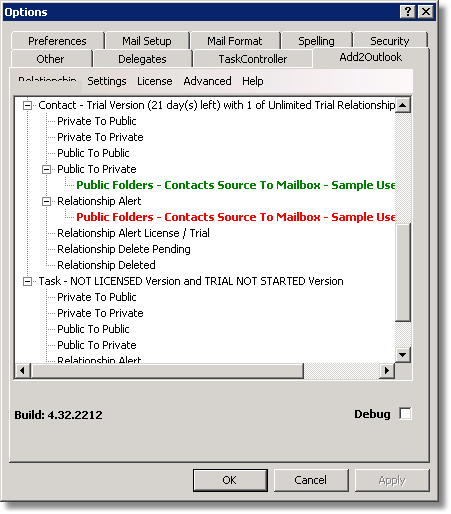
2. Click the Add2Outlook tab, and scroll down to find the red relationship in alert.
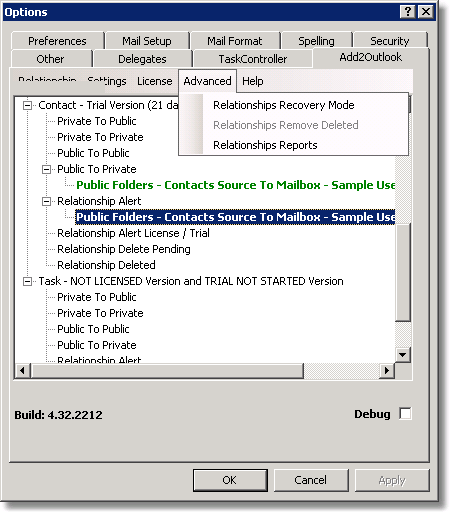
3. Select the relationship and click Advanced then click Relationships Recovery Mode.

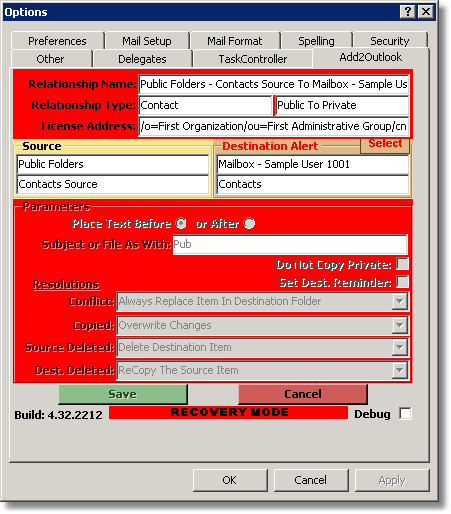
4. When in Recovery Mode, a new label on the screen will be highlighted in red at the bottom and say Recovery Mode. Right click and edit the red highlighted relationship in alert.

5. Make a note of the source and destination folders for this relationship. In the picture above, the source side has a "Select" button next to Source Alert because the source side has not been verified. Make a note of the source folder and click Select.

6. Find the folder in the tree that represents the source folder in the relationship, it will be green, as will all other folder types of that type. Be careful to select the right folder which you want to reconnect the relationship to (in this example it is "Contacts Source" under Public Folders). Click Select Folder.

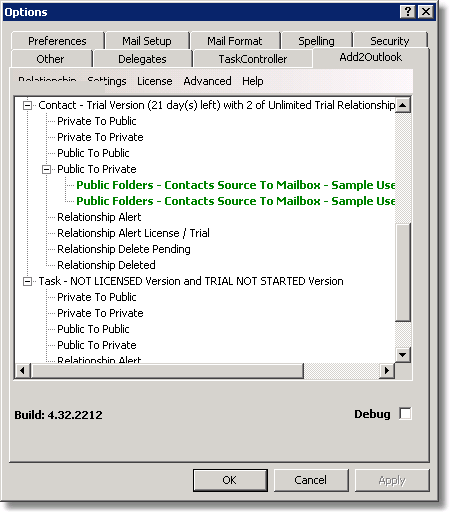
7. If done correctly, your screen should look like the one above. Notice the Source is no longer in alert. Click Save.

8. Notice the relationship is no longer red and is now green. Hit OK and it will be taken out of Recovery Mode.
Note: When you are completely out of recovery mode, your screen will look like the screen below.
Destination in Alert
5. Make a note of the source and destination folders for this relationship. In the picture above the destination side has a "Select" button next to Destination Alert because the destination side has not been verified. Make a note of the destination folder and click Select.
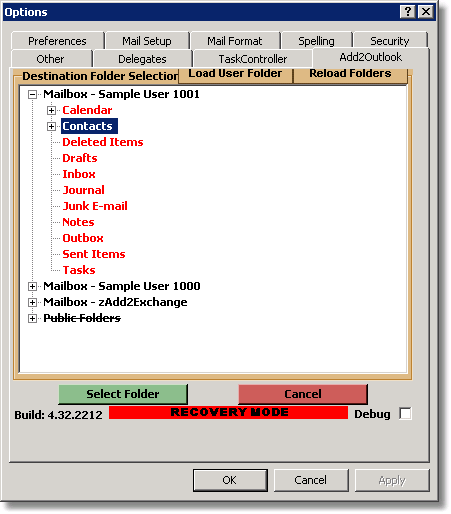
6. Find the folder in the tree that represents the destination folder in the relationship, it will be red, as will all other folder types of that type. Be careful to select the right folder which you want to reconnect the relationship to (in this example it is "Contacts" under Mailbox - Sample User 1001). Click Select Folder.
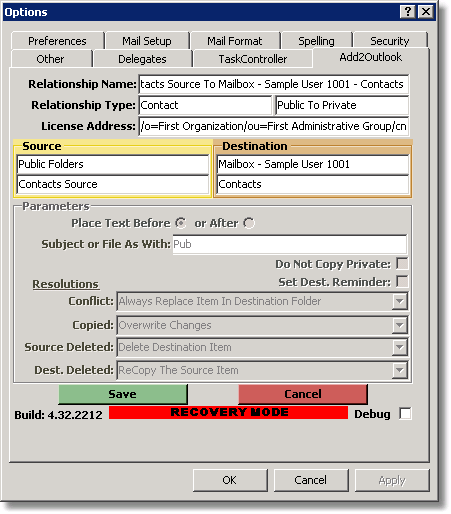
7. If done correctly, your screen should look like the one above. Notice the Destination is no longer in alert. Click Save.

8. Notice the relationship is no longer red and is now green. Hit OK and it will be taken out of Recovery Mode.
Note: When you are completely out of recovery mode, your screen will look like the screen below.
