|
Exchange 2003 Configuration |

  
|
|
| Show/Hide Hidden Text |
|
Exchange 2003 Configuration |
|
|
| Show/Hide Hidden Text |
We will be creating a service account with special Exchange rights.
Create the Account
| 1. | Log onto the Exchange server as an administrator who can create accounts on your domain. |
| 2. | Open Active Directory Users and Computers from the Administrative Tools menu. |
Active Directory Users and Computers
|
|
| 3. | Select the Active Directory container in which you will create the Service Account. Either click the New User icon or right-click the container and select New > User. |
New User Dialog

| 4. | Fill out the account name in the First name and User logon name fields. The names should match. Click Next >. |
Password Dialog
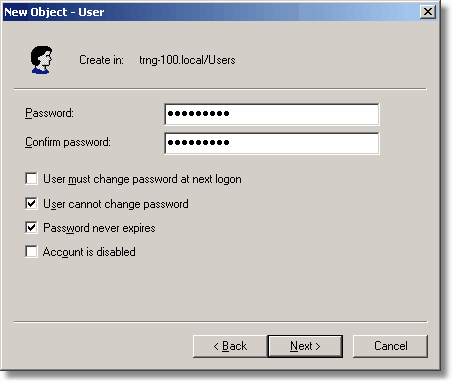
| 5. | Enter the password for the Service Account. Since this account has full administrative permissions, you may wish to use a standard administrative password. You may also want to check the User cannot change password and Password never expires checkboxes. |
Mailbox Creation Dialog
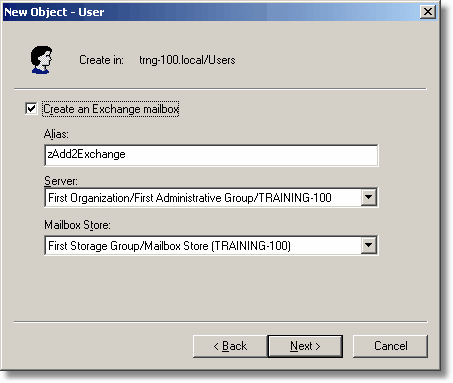
| 6. | Select the server and mailbox store that is in common with the majority of the accounts which have folder to synchronize. |
User Creation Confirmation Dialog
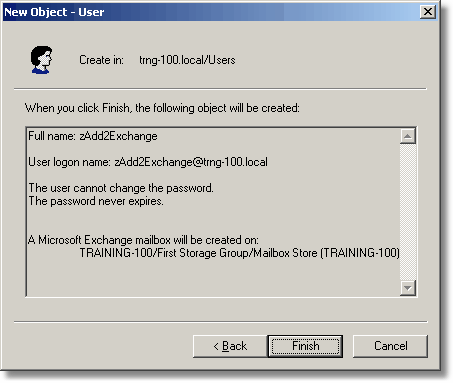
| 7. | Click Finish. |
Active Directory Users and Computers
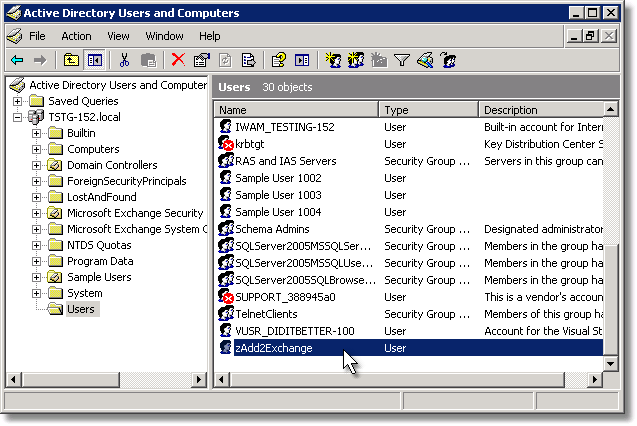
| 8. | In Active Directory Users and Computers, open the Service Account properties by double-clicking on the account. |
Exchange Advanced Tab

| 9. | Select the Exchange Advanced tab. This is to highlight the importance of making sure the Hide from Exchange address lists checkbox never gets checked. |
Service Account Group Memberships

| 10. | Select the Member Of tab. Add the Service Account to the following groups (and only the following groups). Note: Many administrators are tempted to add other groups to this list. Support incidents start at $149. |
| • | Administrators |
| • | Domain Users |
| • | Pre-Windows 2000 Compatible Access |
| • | the Add2Exchange Security Group |
| 11. | Click OK and exit Active Directory Users and Computers. |
| 12. | Add the zAdd2Exchange account to the local Administrators group on this server as well as all Exchange servers. |
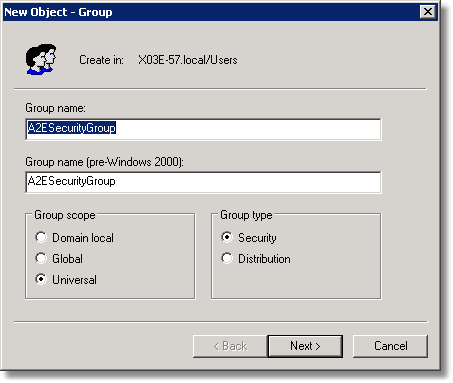
Create a Security Group
| 1. | Open the Active Directory Users and Computers console from the Administrative Tools menu. |
Creating the Add2Exchange Security Group in Active Directory
|
|
| 2. | Select the Active Directory container in which you will create the Service Account (but hold off on creating the account, create the group first). Right-click the container and select New > Group. |
New Group Dialog
|
| 3. | Name the Security Group and choose the broadest scope available (at least Global). Click OK. |
Group Email Dialog
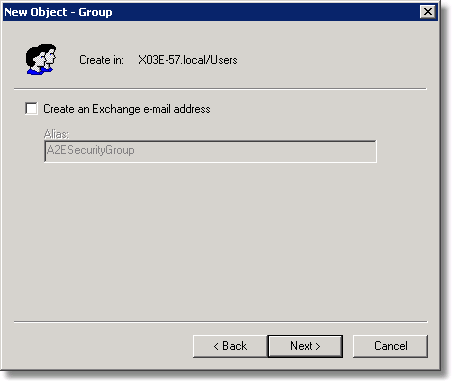
| 4. | Uncheck Create an Exchange e-mail address if it has been selected for you already. Click Next >. |
Group Creation Dialog
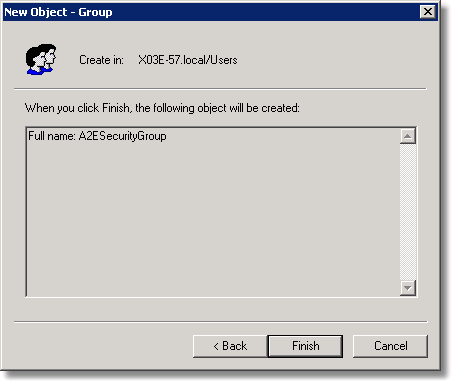
| 5. | Click Finish to finish creating the group. |
Assign Exchange Rights
Registry Security Utility
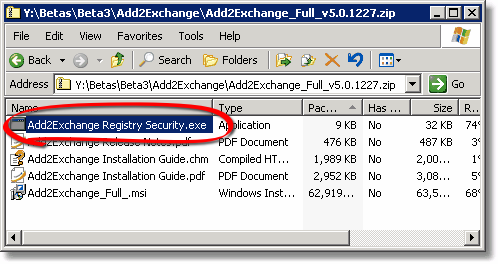
| 1. | The Security tab in Exchange System Manager is not enabled by default. To enable the tab, run the Add2Exchange Registry Security.exe included in the Add2Exchange zip file. |
|
Technical Details For details on how the security utility works, see: http://support.microsoft.com/default.aspx?scid=kb;EN-US;264733. |
| 2. | Open Exchange System Manager and give administrative permissions to the Security Group as follows: |
Exchange System Manager
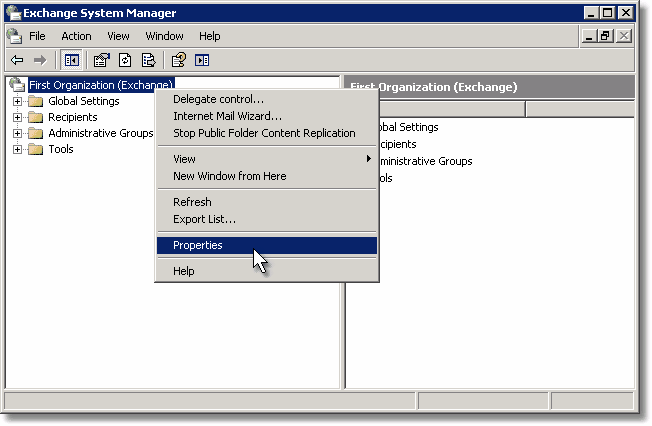
| 3. | Open Exchange System Manager. Right-click the top level of the organization and select Properties. |
Adding the Add2Exchange Security Group

| 4. | Select the Security tab, click Add and select the Add2Exchange Security Group. Leave the permissions as assigned by default and click OK. |
Verifying Inheritance to the Mailbox Store
|
|
| 5. | Expand the first Storage Group. Right-click the first Mailbox Store and select Properties. |
Mailbox Store Security Tab
|
|
| 6. | Select the Security tab and verify that the Add2Exchange Security Group appears with full permissions. |
| 7. | Repeat this process for each Mailbox Store in each Storage Group. If the Security Group is not listed, it is likely inheritance is turned off somewhere between the mailbox store and the top of the Exchange system tree. If so, either: |
| • | follow the Enabling Inheritance procedure below |
- or, if you do not want to enable inheritance -
| • | add the Security Group to the Server or to all Mailbox and public Folder stores directly |
|
Enabling Inheritance
|
Skip this section if... you were able to verify permissions for the Security Group on the Mailbox Store. |
If you have decided to enable inheritance, follow these steps:
Mailbox Store Security Tab Advanced Button

| 1. | Click Advanced. |
Security Inheritance Settings

| 2. | Check the "Allow inheritable permissions..." checkbox. This will enable inheritance at this level in the Exchange system tree. Repeat this step for each other store (public and mailbox), as well as at the Server level. |
Mailbox Store Security Tab

| 3. | Once inheritance is configured properly, the Security Group will appear with gray checkboxes at each store. |
Set Public Folder Ownership
Give the Service Account Client Ownership permissions over each of the public Folders to be synchronized as follows:
| 1. | Open Exchange System Manager. |
|
Note Your view may differ if you don't have Display administrative groups selected in your Organization Properties. |
|
Exchange System Manager
|
|
| 2. | Expand Administrative Groups > First Administrative Group > Folders > Public Folders. Find the first folder, right-click on it and select Properties. |
Per-user Information (General Tab)
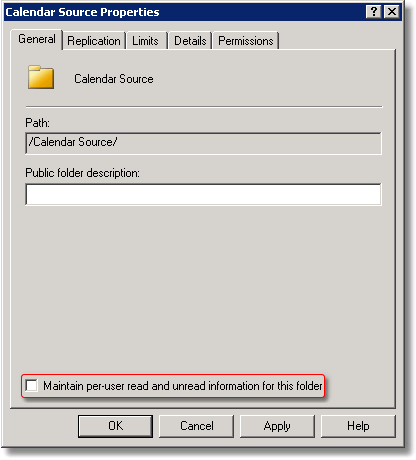
| 3. | Uncheck Maintain per-user read and unread information for this folder. |
Public Folder Permissions
|
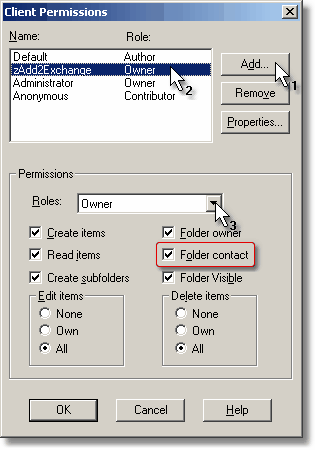
| 4. | Select the Permissions tab and click Client permissions. |
Public Folder Client Permissions
|
| 5. | Click Add… and add the Service Account. |
| 6. | Highlight the Service Account by clicking on it. Select Owner from the Roles drop-down. |
| 7. | Make sure all checkboxes are selected, including Folder Contact. |
| 8. | Click OK. |
Repeat this process for each public Folder.
Initialize the Mailbox
Add2Exchange's mailbox must be initialized by Exchange before syncing. You can do this through OWA or Outlook by simply logging into the mailbox once:
Outlook Web Access
Launch Internet Explorer and go to http://localhost/exchange/zAdd2Exchange. Once you've logged in, the mailbox is initialized and you're done.
Outlook
Log on to a workstation as the Service Account and create an Outlook profile through the Mail Control Panel applet.
blog comments powered by Disqus
Page url: http://guides.diditbetter.com/a2e-guide/exchange_2003_configuration.htm