|
Offline Mode |

  
|
|
|
Offline Mode |
|
|
* Skip this option if you have decided to create a standalone dedicated replication box, or if you are replicating Private-to-Private or Private-to-Public for more than one user.*
Some mobile users want to set up the program on a laptop, so they must work with offline folders. This is not the optimal configuration, as it would be best to have the replication server always connected, and synchronizing, but in some configurations is it the only way and is possible if desired.
The best practices of synchronization would be to set up a standalone Add2Outlook workstation, and have it in Outlook and syncing 24/7 so the mobile device is always up to date and the most up to date information is available. The Add2Outlook box should be online and replicating 24/7. That way when the user connected via mobile device or Outlook Web Access, or the laptop is not connected, the replicated data from a dedicated replication server would always refresh the offline copy without regard to what was saved in the OST. The Exchange and Outlook synchronization would take over and all data would be up to date and continue to be up to date to all connected devices.
Before the program will replicate, it tests to see if the folders are available and from an infrastructure point of view, the standalone replication workstation is a much better configuration than having Add2Outlook on a mobile laptop. Also if the laptop is stolen or damaged, the replication settings may not be retrieved and this presents other hurdles to continued replication.
To set up the program in Outlook in offline mode, there are several steps, depending on the version of Outlook:
Outlook 2003: Tools Email accounts, Exchange Modify properties, Advanced, Cached.
Outlook 2007: Tools Email Accounts, Select the Exchange Account, Change..., More Settings..., Advanced, Cached Exchange Mode Settings and select Use Exchange Cached Mode Settings.
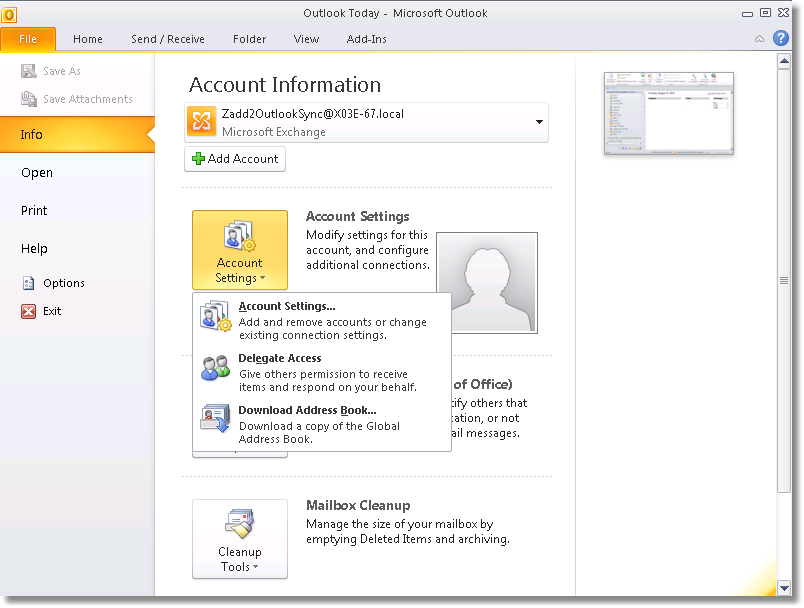
Outlook 2010: File, Account Settings, Account Settings, Select the Exchange Account, Change..., More Settings..., Advanced, Cached Exchange Mode Settings and select Use Exchange Cached Mode Settings.


| • | Then be sure that the Outlook offline folder it created in Outlook (the “OST” file) is located somewhere on the local machine so it is available when truly disconnected from your network. Be sure by selecting Outlook Data File Settings and noting the location of the file it created (see picture below). If it put it on a mapped or shared drive, change the location and make a new one. You will have to restart Outlook and let the synchronization occur before you can continue to set up Add2Outlook. |

Replicating a Public Folder
*We recommend/prefer using online mode to cached mode; however, if wanting to use the cached mode follow the instructions below.
Go back into the Outlook interface and drag your Exchange-side public calendar into the Add2Outlook sync user’s “Favorites” folder, under “All Public Folders”, as shown below.

1. Right click on the folder under All Public Folders, click Copy Calendar.

2. Select the folder and click OK.

3. Click File, Account Settings, select the file, Change..., More Settings..., Advanced. When you reach the menu above, check Use Cached Exchange Mode, Download shared folders and Download Public Folder Favorites then click Apply then OK.

4. Click Next >.

5. A screen will pop up prompting you to restart Outlook. Do so and then go back into the program.

6. Follow the prompts and click Finish.

7. Right click the folder and select Add to Favorites...

8. Click Add.

After you click Add, it will then be in the Favorites folder.
IMPORTANT! Next, you must Define Send/Receive Group and do your first synchronization before you can set up an Add2Outlook relationship! Go into Outlook’s Tools option and depending on your Outlook version either Synchronize Settings or Send/Receive Settings. You will have to set the offline folder settings for each folder. This step determines if the folder is available offline and fills it up with the associated public side items. This MUST be done before setting up the Com Add-in in the next step so you can set up the source or destination folders in Add2Outlook!
Outlook 2003: Tools, Send/Receive, Edit.
Outlook 2007: Tools, Send/Receive, Edit Send/Receive Groups.
Outlook 2010: Send/Receive, Send/Receive Groups, Define Send/Receive Groups.


Tip: Notice the selected option in the above picture. We recommend setting the automatic send/receive when exiting option for the offline setting option to synchronize the Outlook offline folders on exit. This forces a mobile user to always work with current data when offline!
| • | Press Edit... and select all the server-side mailbox and Favorite folders desired offline. For our purposes, select the calendar under the Favorites. |
| • | You must now synchronize the online folders with the offline folders (see picture below). In Outlook, Select Tools, Send/Receive, and All Accounts or just the account you set up, click OK. |

You should now be ready for offline use. Close Outlook and then wait a few seconds, then reopen.
To test for offline availability of the Exchange side folders while connected to the LAN, make sure the program is configured as specified above. Then, select Synchronize all folders. Then disconnect from the LAN, (and it should synchronize again if set up as recommended). Reboot and log back into the computer, then either disconnect from the LAN or go into Outlook by selecting the Offline Mode when prompted (see above).
| • | To Test, while offline, drill down on the public folder/favorites folder and select the desired folder. |
| • | Right click the Favorite’s calendar folder and go to the Properties. |
The Synchronization tab should have a time date for last synchronization. If this is the case, then you are ready for offline use. Next, you need to set up the relationship to or from this offline folder. If not, repeat the steps above until it shows a synchronization date and time. Then continue. If not, then go back and make sure your settings are specified as above. If all else fails, ask for help.
Once this is complete, continue making a relationship.
Now when setting up the relationship, set the source or destination folder to the calendar in the All Public Folder Favorites.
The program is now set up to work online or offline and is enabled for Outlook Synchronization.