|
Folder Permissions |

  
|
|
|
Folder Permissions |
|
|
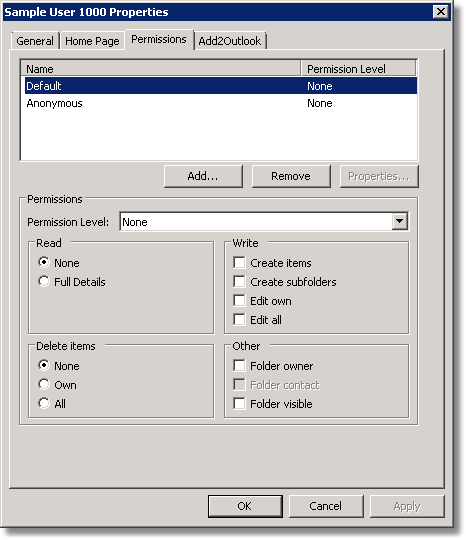
Because Add2Outlook uses special custom fields, you or the user you are installing this for must have “Owner” permissions to both the source and destination folders in order to add the required fields to the folder(s). By default, if any user creates a calendar folder through Outlook, they have explicit ownership to that folder, but the replication service account may not have permissions. If the folder to replicate is within the mailbox of the user, you must still give the replication service account explicit OWNER permissions to the folder as shown below.
Right click the folder to replicate to or from, go to Properties and add the replicating user account as OWNER. If you have many relationships to many users and have correctly decided to install the software on a dedicated workstation, then you would create a replication Service account. In our examples below, we have shown you the configuration options as if you created an Add2Outlook Replication Service Account.
If the program is being installed with a source or destination folder in the Exchange public folder system, the replication user who installs the program must have the security level of “Owner” so the custom fields can be added in the source folder and all other public folders Add2Outlook will replicate to or from. After a successful install and replication, the user fields are created in the folders, and subsequent users who are to be set up on the same folder do not have to be an Owner to install and configure. Subsequent users must have at least Editor to Publishing Editor permissions (with Publishing Editor as the most common). Regardless, everyone who uses Add2Outlook has to be an owner of their own server-side mailbox or PST.
Let’s make sure your replication user has the appropriate permissions:
If you created a new folder through Outlook, you have explicit client Owner status for that folder and you can proceed. To test to see if you have the appropriate permissions, log on as the user, open Outlook and right click on the source and destination folders. Go to the Properties of the folder and if there is a Permissions tab, the user may or may not be an Owner. Add the service account users DOMAIN account to the Permissions tab and give Owner status. Do this for any source and destination folder. Then the install and setup can proceed.
Permissions:
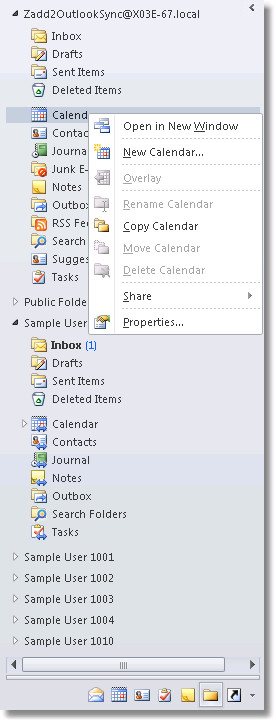
1. Right click Calendar and select Properties...

2. Click the Permissions tab and select Add...
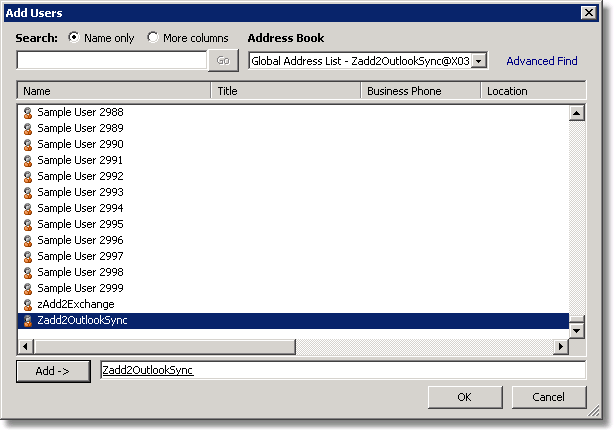
3. Pick the Add2Outlook Service Account, click Add - > and then press OK.

4. Then select the Service account name from the list and use the Permissions Level drop down to select Owner and Folder Contact. Press Apply then OK.
Tip: If these permissions are made during the creation, you may have to close Outlook and reopen it again to continue.
Public Folder Permissions: In Outlook, you can drill down to the public folders and right click the source or destination folder. If you have a Permissions tab, do the same procedure as above. If you do not have the Permissions tab, you may be able to do this procedure from an account which has privileges (the creator of the folder usually does) or in Exchange System Manager or if hosted, from your Exchange provider's web based control panel if they provide one.
If you host your own Exchange Server, you can give permissions as noted in the section below the next:
If you don't host your own exchange server, and you are in hosted mode, the immediately following procedures to give folder permissions:
Optimal configuration for both online and cached mode to maintain a high level of security:
The 2003 and 2007 and 2010 instructions are optional instructions if you host your own exchange or have access to your Exchange Server.
Give full mailbox access in your hosted web portal to the zAdd2Outlook service account or the account you are replicating with and for each user you are replicating to or from.
1. Open Outlook, preferably in online mode.

2. Right click the user mailbox and select Data File Properties...
3. Add the users mailboxes. Click the Permissions tab then click Add...

4. Scroll down and select the account. Click Add - > then OK.

5. Give Reviewer permissions to the service account (zadd2Outlook) to the mailbox – do not change the service account permissions on the service account mailbox. Click Permissions and add the service account as Reviewer. Click Apply then OK.
6. Give Reviewer permissions in the same way to any folders in-between the mailbox and the ultimate source or destination folder where the items are going to be replicated to or from. In our example the ultimate source/destination folder is the Global Contacts folder under the Contacts folder. So in our example we will give Reviewer status to the Mailbox, the Contacts and then to the Global Contacts, giving owner permissions. So in recap, each folder from the mailbox to the ultimate destination folder will have Reviewer Status and the ultimate source or destination folder will get Owner status to the replication service account.
Note: By the term "any folders in-between" the mailbox and the ultimate source or destination folder, exclude folders such as Inbox, Drafts, Sent Items, Deleted Items, etc. You should only be concerned with the folders you are replicating to or from.
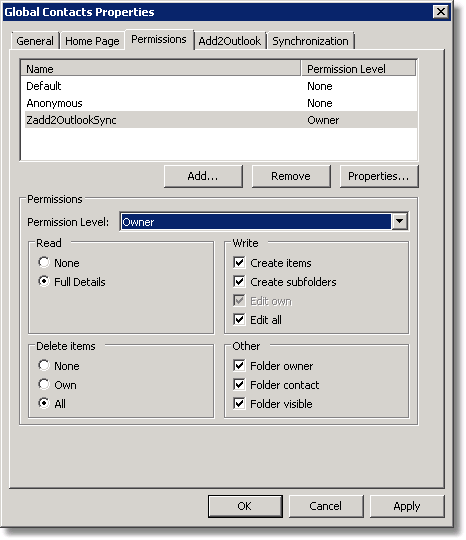
7. Be sure to give Owner permissions to the ultimate source or destination folder. Click Apply then OK.
8. Then do this for all users you are replicating to or from; in our example we did this for Sample User 1000 and Sample User 1001.
*Check all permissions for each source or destination folder in each mailbox before the next step*
Close Outlook.
Next, perhaps with the help of your administrator, go back to the web portal and remove full mailbox permissions to the Service account for every mailbox you gave it to prior.
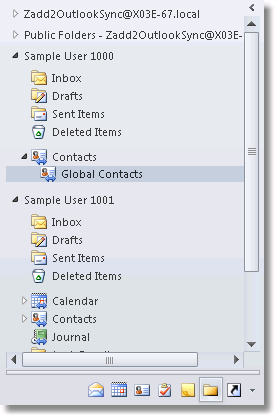
Then open Outlook and only the folders we need to see are visible and with the proper permissions; as you can see the number of folders are decreased under Sample User 1000 versus when it was assigned full mailbox permissions in order to increase the level of security.
*This change may not be immediate and may take a moment for the hosting provider to replicate permissions.
Doing this process above will limit what information this account has access to, and maintains a higher level of security.*
Please go to the next section.
On Premise Exchange
If you host your own Exchange Server, you can give permissions as noted in the following section below.
TIP: If you have access to your exchange server, please consider the server based product. The server based product does not require it to be installed on the server, it could installed on the server, a VM, a utility server without Outlook on it or a dedicated workstation. See this section: Is Add2Outlook Right For You?
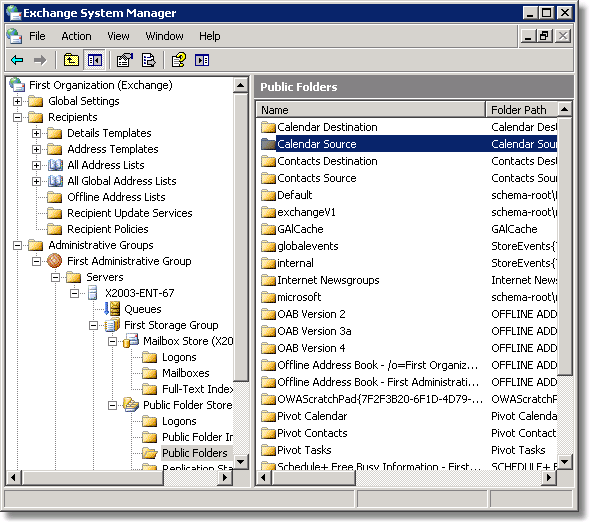
Exchange 2003: Open the Exchange System Manager and drill down to your public folder.
1. Right click Calendar Source then click Properties.
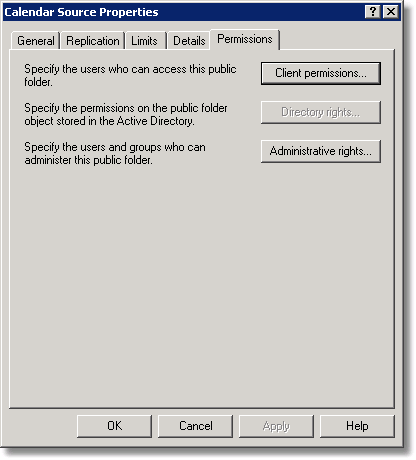
2. Click the Permissions tab on the top of the page and then click Client permissions...
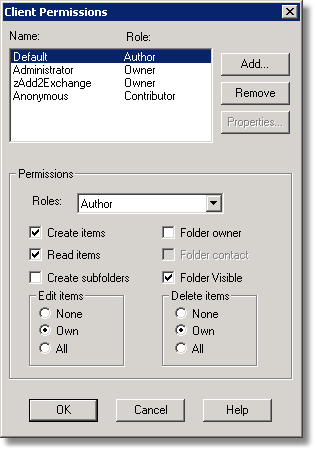
3. Click Add... to select the user.
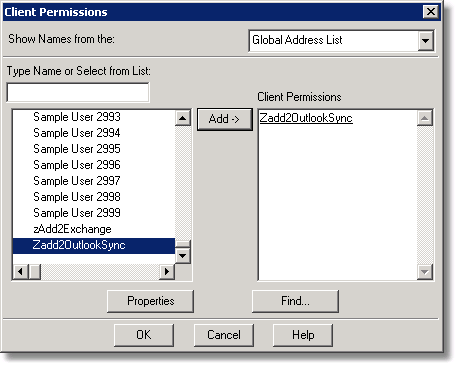
4. Select the user and click Add - > then OK.
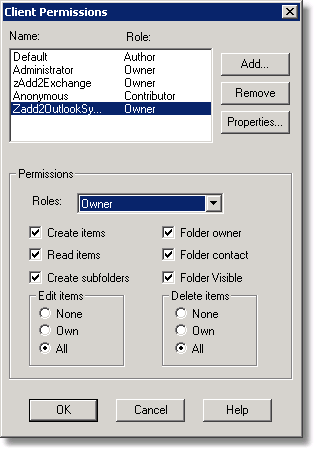
5. Assign the user Owner permissions and click OK.
Once this has been done for all private mailboxes and public folders you will be replicating to or from, then folder permissions have been granted and you can proceed to the next section.
Exchange 2007 and 2010: Open the Exchange Management Console.

Giving Full Mailbox Permissions:
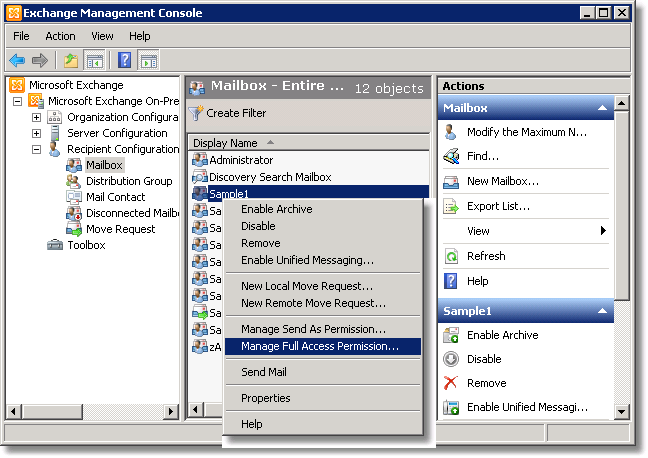
1. Click Mailbox and select the mailbox you want to give permissions to, Sample 1 in this example, right click and select Manage Full Access Permission...

2. Click Add...
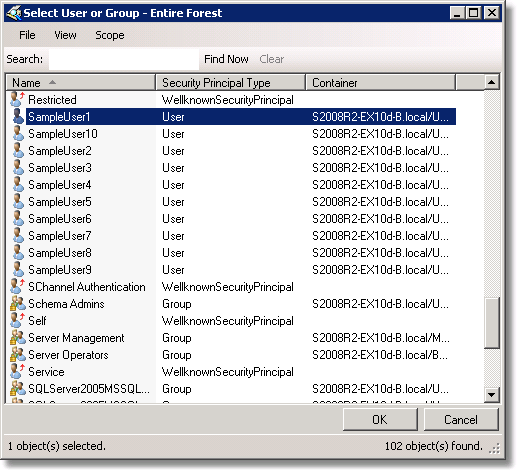
3. Scroll down and find the user you want to give permissions to. Click OK.

4. Select the user and click Manage.
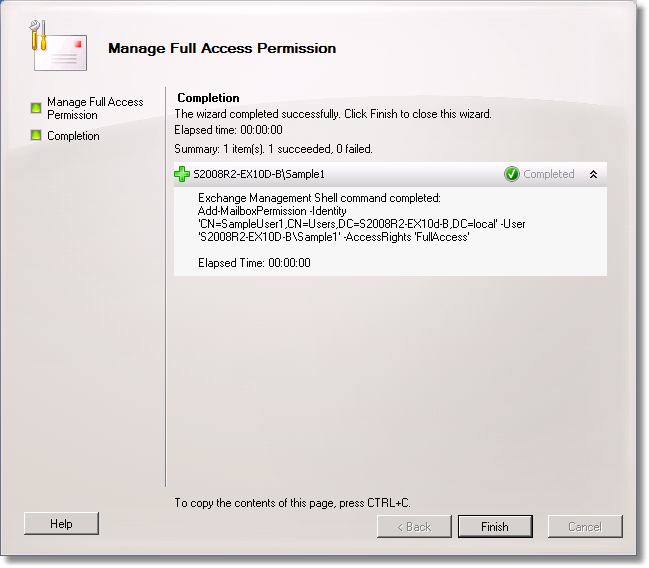
5. Click Finish.
Giving Public Folder Permissions:
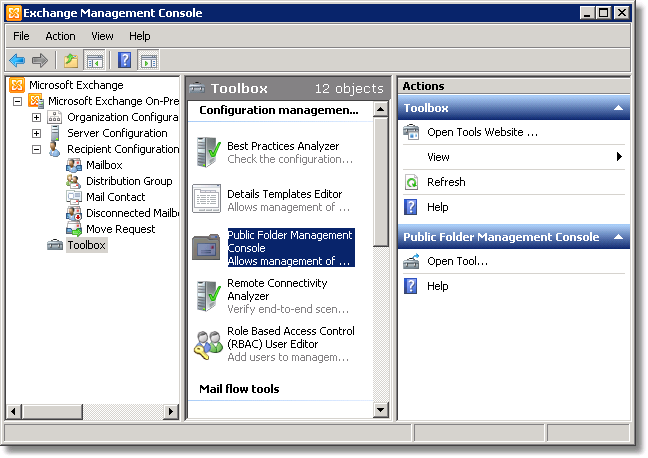
1. In the Exchange Management Console, click Toolbox and select Public Folder Management Console.

2. Click on Default Public Folders, and from the second box select the folder you want to give permissions to and right click, selecting Manage Send As Permission...
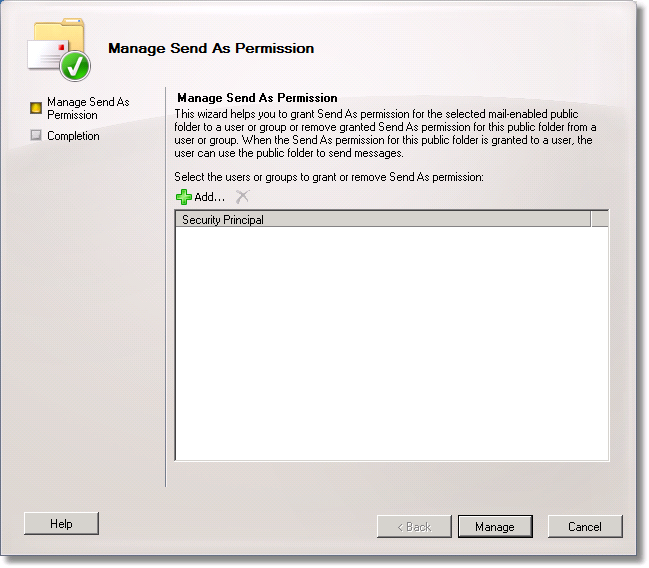
3. Click Add...
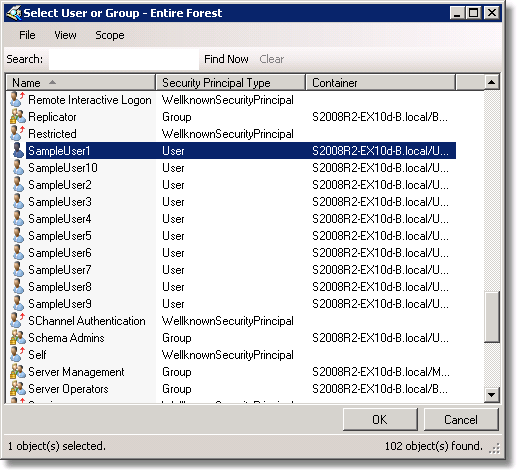
4. Scroll down and select the user you want to give the permissions to. Click OK.

5. Select the user and click Manage.

6. Click Finish.