|
Initiating the Server Move |

  
|
|
|
Initiating the Server Move |
|
|
|
Licensed Tool If you have not already licensed the Add2Exchange Toolbox, see the section Licensing the Add2Exchange Toolbox for details. |
Add2Exchange Toolbox Desktop Shortcut
| 1. | Double-click the Add2Exchange Toolbox icon. |
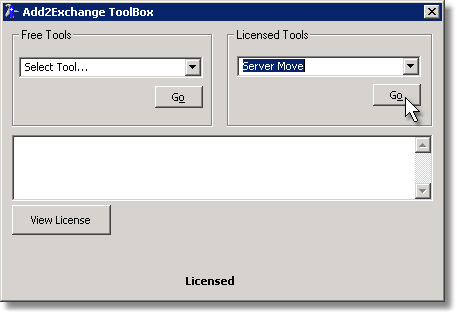
Add2Exchange Toolbox
|
|
| 2. | From the "Licensed Tools" dropdown, select Server Move. Click Go. |
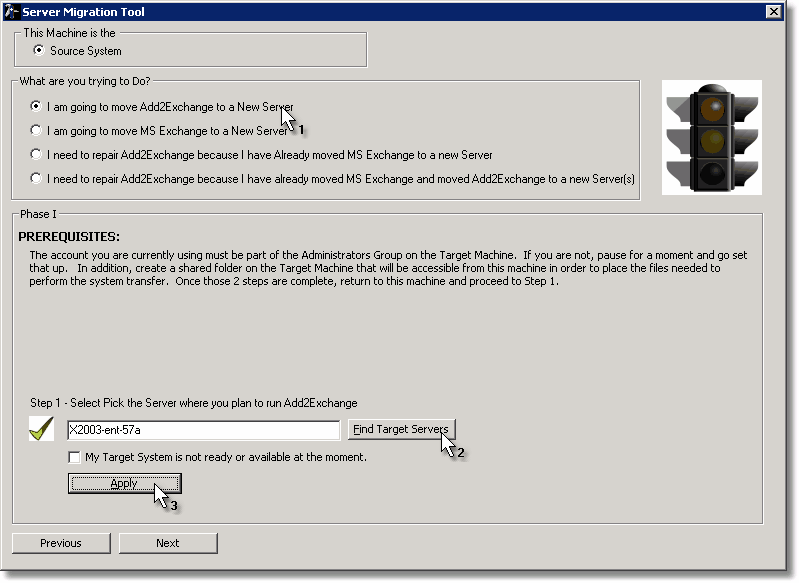
Server Migration Tool Phase I Dialog
|
Under Construction ...Move Add2Exchange to a New Server is currently the only option implemented. Do not select any other option. |
| 3. | Select I am going to move Add2Exchange to a New Server. |
| 4. | Click Find Target Servers. |
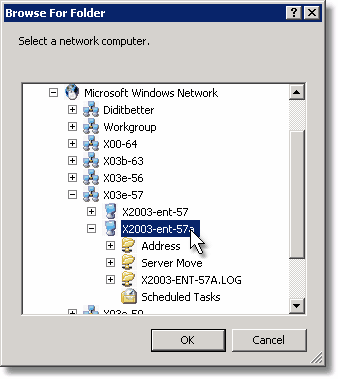
Server Selection Dialog
|
|
| 5. | Select the target server. |
| 6. | On the Phase I dialog, click Apply. Click Next. |
Phase II Dialog
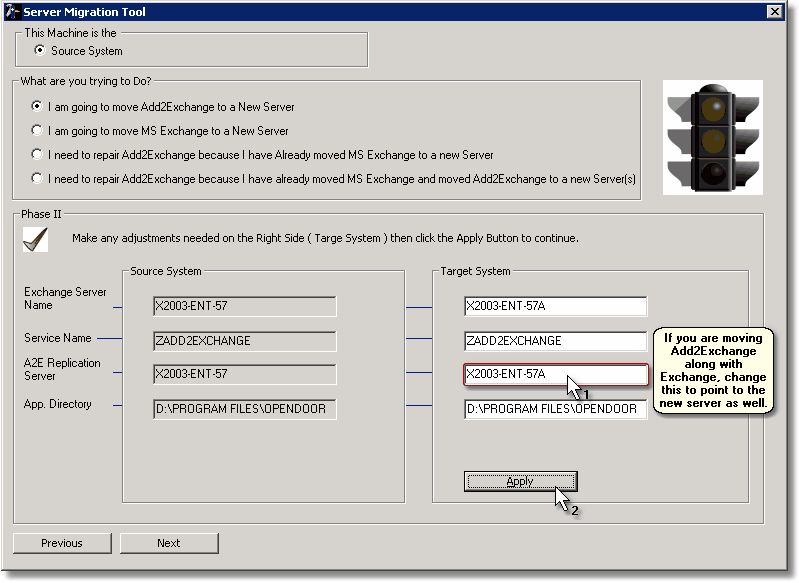
| 7. | Verify the fields under the Target System heading and change the A2E Replication Server field to match the new server. Click Apply and Next. |
Phase III Dialog
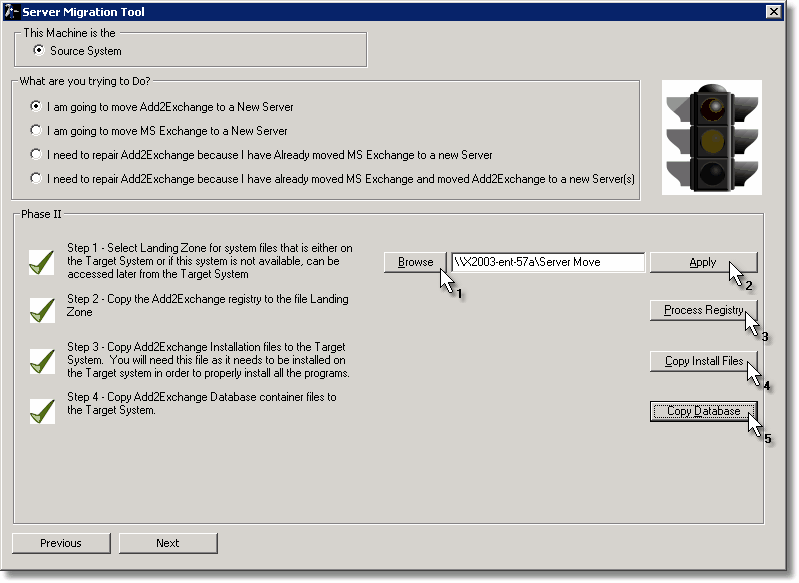
| 8. | Click Browse. |
Folder Selection Dialog
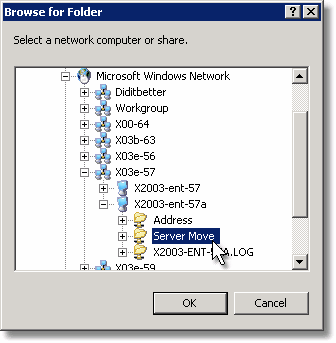
| 9. | Select the Target Landing Zone share from the destination server. Click OK. |
| 10. | On the Phase III dialog, click Apply, then Process Registry and Copy Install Files. |

| 11. | Select the Add2Exchange installer MSI file. Click Open. |
| 12. | On the Phase III dialog, click Copy Database, then Next. |
Phase IV Dialog
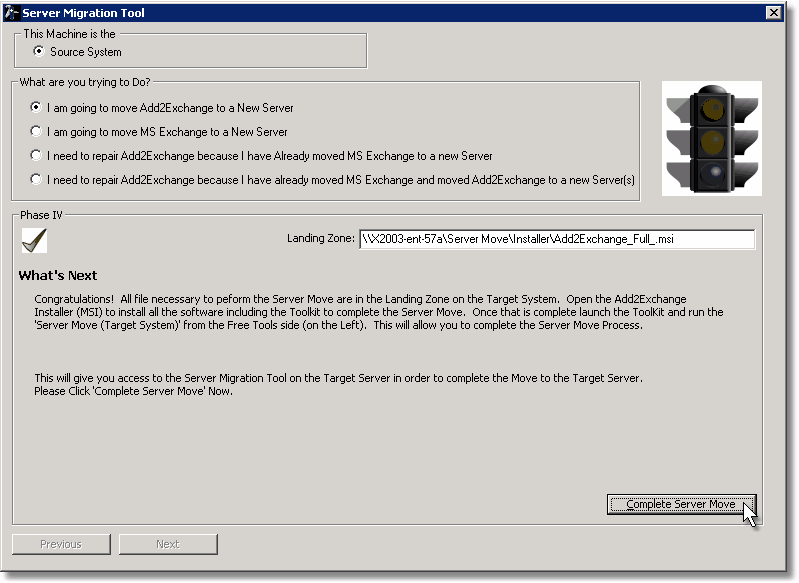
| 13. | Click Complete Server Move. Close the Server Migration Tool and the Add2Exchange Toolbox. |
You may now move your mailboxes (including the Service Account mailbox) and public folders to the target server. Once you have completed moving your mailboxes, continue with the next section.
blog comments powered by Disqus
Page url: http://guides.diditbetter.com/a2e-guide/initiating_the_move.htm