|
Licensing the Add2Exchange ToolBox |

  
|
|
|
Licensing the Add2Exchange ToolBox |
|
|
Contact your DidItBetter Software account representative or visit: Store/Add-On Tools to purchase the Add2Exchange Toolbox.
Once you have completed your purchase, follow these steps to request and install your Toolbox license:
Add2Exchange Toolbox Desktop Shortcut
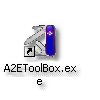
| 1. | Double-click the Add2Exchange Toolbox icon. |
Add2Exchange Toolbox

| 2. | Click License this Tool. |
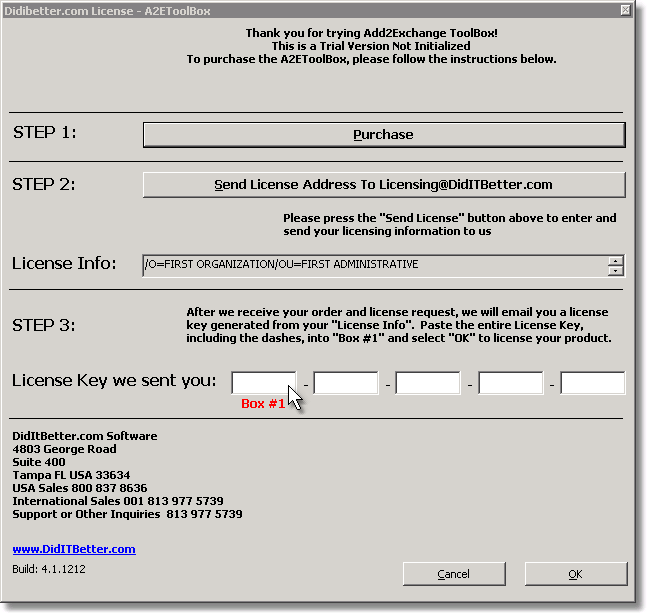
Licensing Dialog
|
|
| 3. | Click Send License Address To Licensing@DidITBetter.com. |
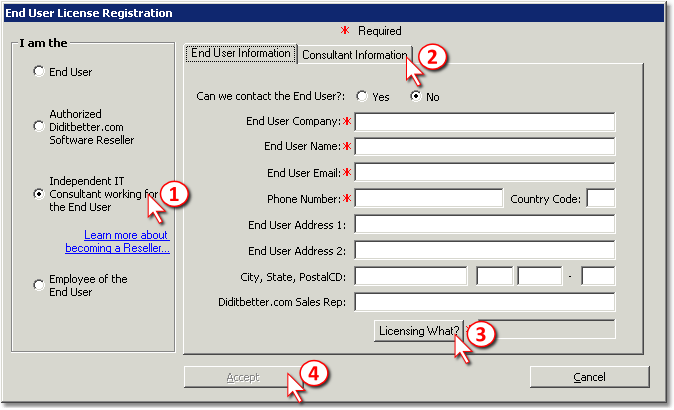
License Registration Dialog
|
|
| 4. | Click the appropriate role under I am the.. and fill out the required fields on the right-hand side. Fill out both tabs and click Licensing What? |
Product License Selector

| 5. | Select Add2Exchange Toolkit from "Available License Products". Click Add to My License Selection Below. Click Done. Your license request will have been sent to DidItBetter Software. Allow up to three business days for your key to process. |
| 6. | On the License Registration dialog, click Cancel. |
Licensing Dialog
|
|
| 7. | When your key arrives, reopen the Licensing dialog and enter your key in Box #1. Click OK. |
Page url: http://guides.diditbetter.com/a2e-guide/licensing_the_add2exchange_to2.htm