|
Creating a Relationship Template in RGM |

  
|
|
|
Creating a Relationship Template in RGM |
|
|
A group relationship consists of a relationship template combined with distribution lists. These steps assume you already have a distribution list defined for the group relationship, if not, use Outlook to create the distribution list. For details, see the section Group Relationships, Lists and Templates.
Creating a group relationship from scratch requires two steps.:
| 1) | Create a relationship template. |
| 2) | Attach the template to a distribution list. |
Attaching the template to a distribution list causes the relationship to be created for each user in the distribution list. See the following sections for details on each step.
Relationship Group Manager Dialog

1) Click New.
Template Relationship Creation Dialog: Step 1

2) Complete Step 1:
| a) | Make sure the This is a Template Relationship checkbox is checked. |
| b) | Select the appropriate message type for the folders in question. In this example we will make a calendar relationship. |
| c) | Click Select. |
| d) | Click Next. |
Template Relationship Creation Dialog: Step 2
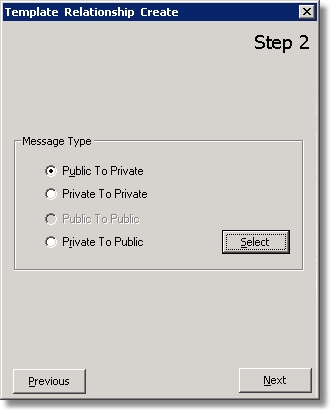
3) Complete Step 2:
a) Select the folder locations for the relationship.
b) Click Select.
c) Click Next.
|
Be Aware There must be a public and private folder in the relationship. The public folder is an actual public folder which will be synchronized. The private folder is a template folder which will be replaced with each instance of the private folders in the group(s) which use the template. In this example, we will use a public-to-private relationship. The public-to-private selection is a type of folder publication setup (see the section Synchronization Models), which publishes the contents a single source folder to multiple destination folders. The other option available here, the private-to-public selection, is a type of folder aggregation setup, which aggregates the contents of multiple source folders into a single destination folder. |
Template Relationship Creation Dialog: Step 3-1

4) Complete Step 3:
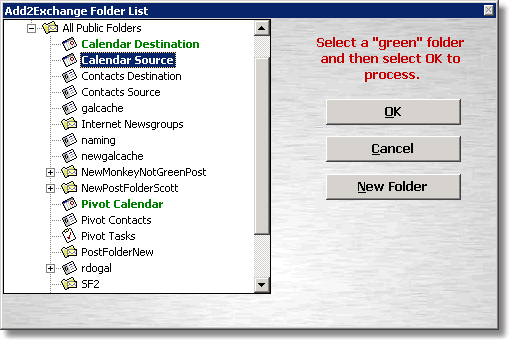
a) Click Select Folder.
Public Folder Selection Dialog
 .
.
b) Select Calendar Source and click OK.
Template Relationship Creation Dialog: Step 3-2
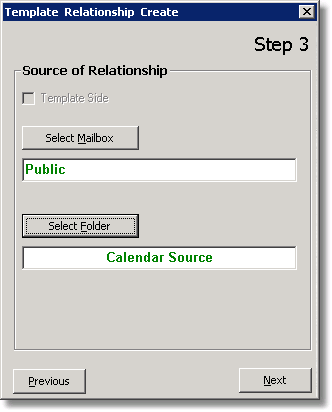
c) Click Next.
Template Relationship Creation Dialog: Step 4-1
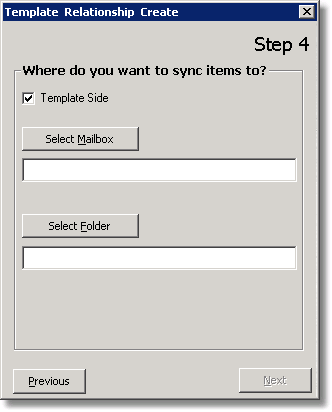
5) Complete Step 4:
a) Click Select Mailbox.
Private Folder Selection Dialog
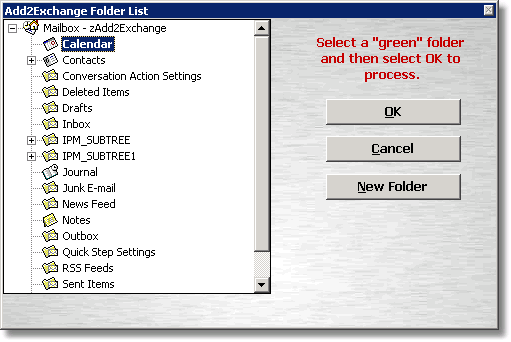
b) Select Calendar and click OK.
Template Relationship Creation Dialog: Step 4-2
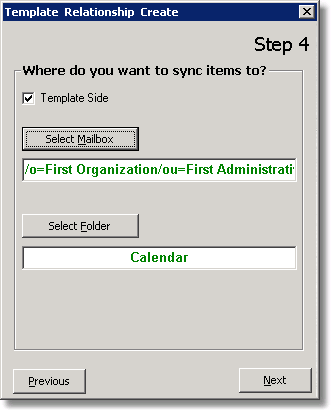
c) Click Next.
Template Relationship Creation Dialog: Step 5-1

6) Complete Step 5:
Template Relationship Creation Dialog: Step 5-2
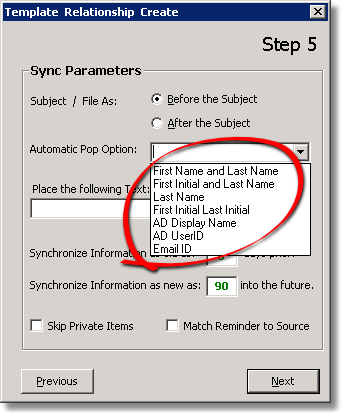
a) Choose the settings for the relationship. For details see the sections Recommended Relationship Settings and Relationship Setting Reference. If this is a private-to-public relationship, you may optionally choose one of the automatic population options based on the source user's account information as shown above. This setting is not required however.
Template Relationship Creation Dialog: Step 5-3
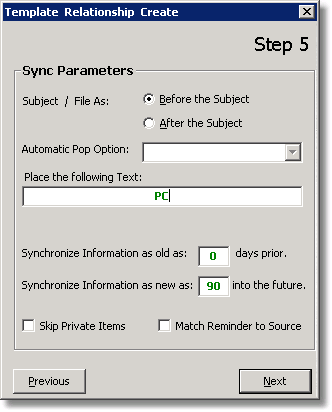
b) If you don't wish to use one of the predefined automatic population options, you may also (optionally) choose to make a custom population field in the Place the following Text text-box. In this example, we are using the custom text "PC" to represent "Public Calendar". Each of the copies of the meetings from this calendar that appear in a destination folder will have "PC: " marking the subject line of the meeting. You will usually use this feature with private-to-public templates (folder aggregation), not public-to-private templates (folder publication), so you may choose to not follow this example.
c) Complete the rest of the settings as appropriate. For details, see the sections. In this example we are using the defaults, which are sufficient in most cases.
d) Click Next.
Template Relationship Creation Dialog: Step 6-1
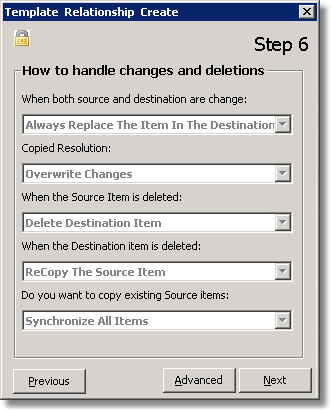
7) Complete Step 6:
| a) | Choose the settings appropriate to your synchronization profile. In this example, we will keep the default settings, which are for a one-way relationship. |
| b) | Click Next. |
Template Relationship Creation Dialog: Step 6-2
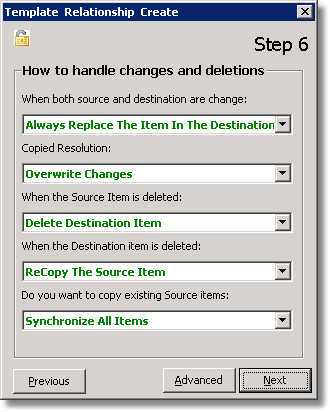
Note: At this point the relationship is locked one-way. If you wish to have the relationship be bidirectional, you must click the little lock icon in order to do so.
8) Regarding Step 7: Skip the Advanced options unless you know you have the need for them. For details see the section Advanced Options Rule (Calendars Only).
Template Relationship Creation Dialog: Step 8
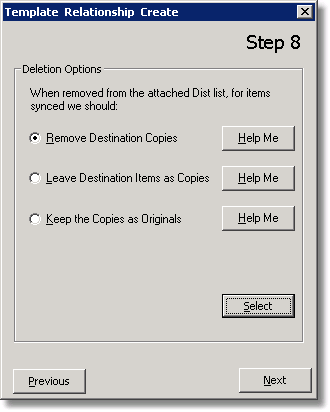
9) Complete Step 8:
a) Select What to do with Messages when a User is Deleted. It is recommended you select Remove Destination Copies. See the section Deleting Relationships.
b) Click Select.
c) Click Next.
Template Relationship Creation Dialog: Step 9
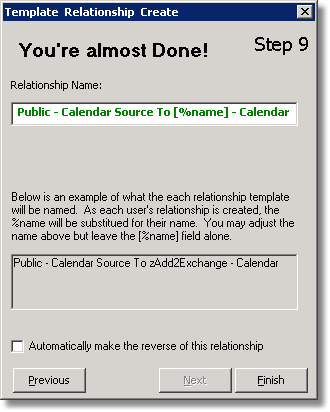
10) Complete Step 9:
a) If necessary, change the name of the relationship to suit your needs. In most cases the default should be sufficient. Be sure to not remove the [%name] reference. This field is needed in order to substitute the name of the actual account using this template.
b) If you want to do both folder publication and folder aggregation, check the Automatically make the reverse of this relationship. When complete, another template relationship will be created with the same settings that reverses the source and destination folders for you. The reverse relationship template will show up and be managed as a separate relationship from this original one. The steps to complete the reverse relationship are not shown here.
c) Click Finish.
Template Relationship Creation Dialog Finish Screen
Congratulations, you've finished creating a relationship template!
blog comments powered by Disqus
Page url: http://guides.diditbetter.com/a2e-guide/creating_a_relationship_templa.htm
