|
Creating a Single Relationship |

  
|
|
| Show/Hide Hidden Text |
|
Creating a Single Relationship |
|
|
| Show/Hide Hidden Text |
If you are making a single relationship follow the instructions below. If you are creating a group relationship follow the instructions in the section Relationship Group Manager (RGM).
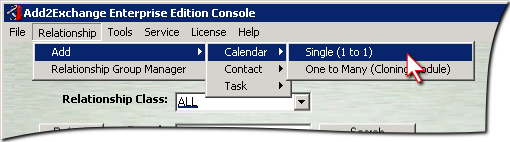
Console Main Window
In this example we will create a calendar relationship. The steps are substantially the same for contact and task relationships as well. Differences are noted where they appear.
| 1) | Select the menu Relationship > Calendar > Single (1 to 1). |
Relationship Creation Dialog

| 2) | Follow these steps: |
| a) | Pick the type from the Relationship Type dropdown. Consult the following table for details on the relationship types. For our example, we will choose Private-to-Private. |
| b) | Click Select. |
Type |
Description |
Pivot Folder Required? |
Public-to-Private |
From a folder under public Folders to a folder in a user's mailbox |
No |
Private-to-Public |
From a folder in a user's mailbox to a folder under public Folders |
No |
Private-to-Private |
From a folder in one user's mailbox to another's (requires a Pivot Folder under public Folders) |
Yes |
Public-to-Public |
From one folder under public Folders to another (does not require a Pivot Folder) |
No |
Pivot Folder Dialog

| 3) | Since this is a private-to-private relationship, you need to pick a pivot folder. Select a folder set up for this purpose, then click OK. See the section Create Pivot Folders for details. |
|
Help! If a folder does not appear in the list, go to Exchange System Manager and find the folder in question. Make sure the folder permissions are as described in the section Assign Public Folder Ownership, verifying both the folder ownership by the service account as well as the folder contact status. Also verify the service account is not hidden from the Global Address List. |
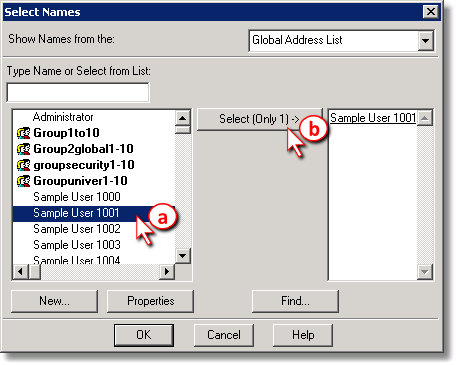
Source Mailbox Selection Dialog

| 4) | Complete these steps: |
| a) | Select the username of the source mailbox from the list on the left. |
| b) | Click Select (Only 1) ->. You may only select one user for the source folder. |
| c) | Click OK. |
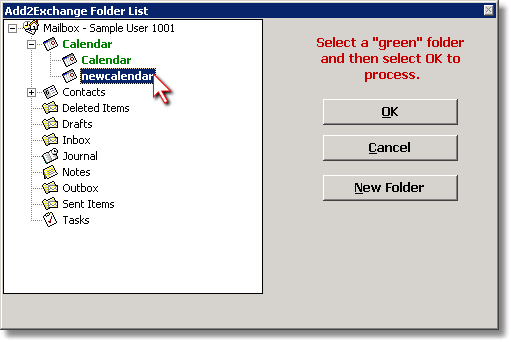
Mailbox Folder Selection Dialog

| 5) | Select the source folder for synchronization. For this example, we will choose the default Calendar folder. Click OK. |
|
Tip The colors of the folders in the folder selection dialogs tell you whether the folders are of the correct type for the relationship and whether their permissions are configured properly for Add2Exchange. See the diagram for details. |
|
|
Relationship Settings Dialog

| 6) | Click Select Mailbox on the destination side. |
Destination Mailbox Selection Dialog
| 7) | Complete these steps: |
| a) | Select the username of the destination mailbox from the list on the left. Note that we are not picking the same mailbox as the source in this example. |
| b) | Click Select (Only 1) ->. You may only select one user for the destination folder. |
| c) | Click OK. |
Mailbox Folder Selection Dialog
| 8) | Select the source folder for synchronization. For this example, we will choose the newcalendar subfolder. Click OK. |
Relationship Settings Dialog

| 9) | Fill out the rest of the relationship settings according to the synchronization model you are using. For details, see the sections Synchronization Models, Synchronization Profiles and Recommended Relationship Settings. In this example, we are using settings appropriate for one-way synchronization. |
| 10) | When you are finished with settings, click OK. |
Relationship Confirmation Dialog

| 11) | Verify the name of the relationship is acceptable and click Yes. If you want to change the relationship name, click No, make your edits and then click OK and Yes. |
Mutual Relationship Dialog
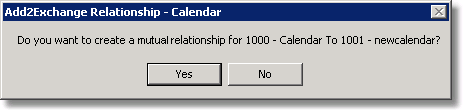
| 12) | A mutual relationship is a new relationship with the source and destinations of the current relationship swapped. For details, see the section Concepts. For this example, we will create a mutual relationship. |
|
Tip A mutual relationship is a normal relationship and may be created at a later time through the regular relationship creation process. Simply create a relationship with the source and destination folders swapped. You may want to use the same settings as this relationship, in which case it helps to check the existing relationship settings before making the mutual relationship. |
Mutual Relationship Settings Dialog

| 13) | Notice the following: |
| a) | The source and destination folders from the previous relationship have been chosen and swapped. This is what makes this a mutual relationship. These cannot be changed, so if you want a different relationship, cancel this relationship creation dialog. |
| b) | All settings from the previous relationship carry over automatically except for the autopop feature. If you want destination items to be tagged, you need to enter a new setting here. |
| c) | The Conflict Resolution and Copied Resolution triggers keep their settings from the previous relationship as well but this may not be what you want. If one folder is supposed to be a "master" that always wins during conflicts, you may need to switch the Conflict Resolution setting. Likewise, you may want a two-way relationship for edits in one direction but not the other. This is usually the exception rather than the rule, however. |
| d) | Click OK to create the mutual relationship. |
Additional Relationship Dialog
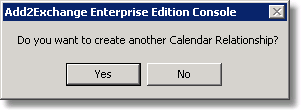
| 14) | If you would like to continue creating relationships of the same type, click Yes. Otherwise click No. |
|
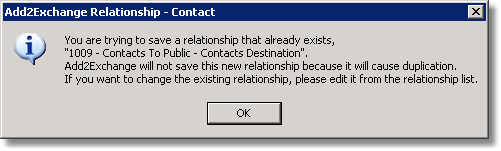
Help! If you receive an error informing you of relationship duplication, make sure deletion of any prior relationship has completed. For details, see the section Deleting Relationships. |
Relationship Duplication Dialog
|
Page url: http://guides.diditbetter.com/a2e-guide/creating_a_relationship.htm